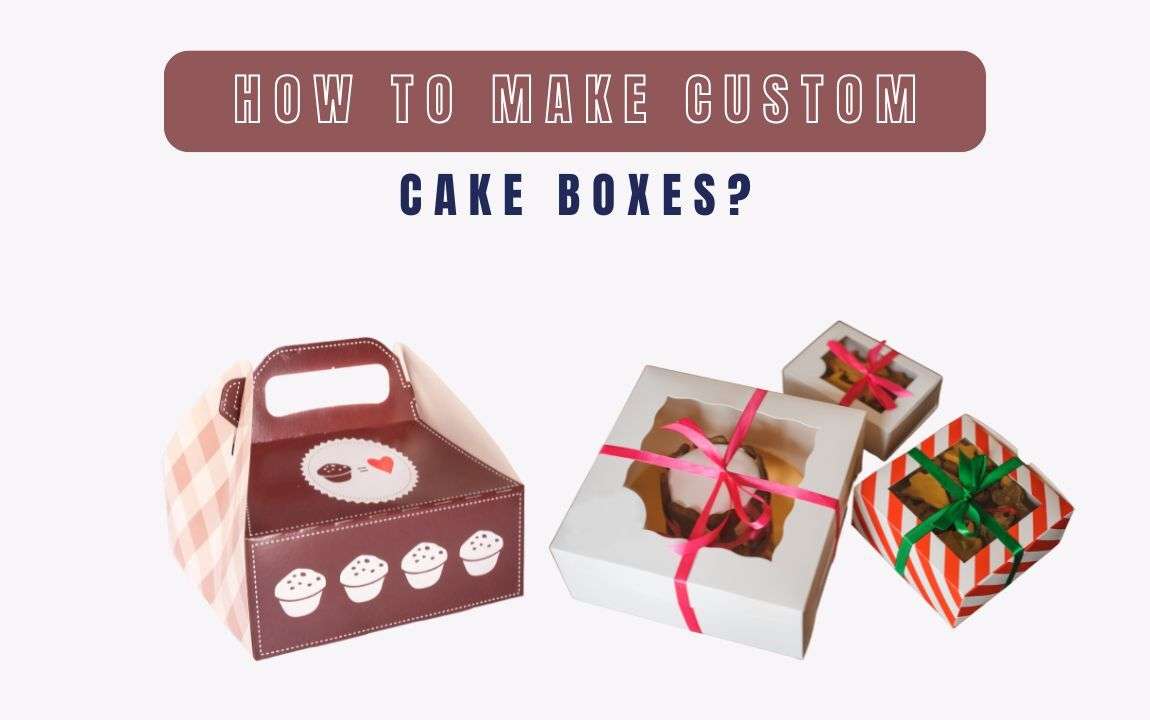
Although the standard cake boxes serve the purpose, using other cake boxes or making one’s own individual cake boxes may be tricky if the cakes do not fit standard carton sizes. If you are fed up with costly, boring cake boxes, why not learn how to create your own special, attractive looking containers? Cake boxes are a great idea to add some form and style to your cakes , so that it looks good and stays fresh from inside.
Regardless of whether you are creating tiny cute baking packaging materials for small pastries, or creating huge boxes for layered cakes, take a glimpse at the basic steps on how to generate cake containers from nothingness below. Ourальной you will be able to design stunning and unique cake boxes using a few materials and within several steps.
Gather Your Materials
Before beginning the process of designing a cake box or developing a new one, it is important to have the required material. Cardboard or cardstock is essential since, for bigger cakes that may be difficult to hold, stiffer material like cardboard is ideal. Similarly, cardstock works well for cupcakes or other smaller pastries. A ruler and pencil are necessary to ensure the food boxes fit your measurements perfectly. Scissors or a craft knife help make precise cuts along the lines of the design. Tape or glue is needed to select an adhesive that holds the box firmly without separating. Decorative supplies, such as name stickers, ribbons, or stamps, can make the box unique. Transparent window film is optional if you want a clear area to showcase the cake and enhance its presentation. This set of supplies is basic and inexpensive, making it ideal for constructing unique food boxes—whether thin ones for pastries or larger square boxes for cakes.
Measure Your Cake for a Perfect Fit
There is no shortcut to the perfect custom box size – the only requirement is measurement. Here’s how you can do it:
- Measure the Diameter and Height: If you have a round cake, it’s easy to do – measure the diameter and the Cake Height. For square cakes, only width, length and height should be measured.
- Add Extra Space: You should then take around an inch more to your measurements. This space guarantees you that your cake will slide into the box without having any contact with the walls.
- Mark the Dimensions: Using a ruler, take your cardboard and make these measurements on it.
The right size also stops your cake from getting squished or damaged in one way or another when driving to the destination. This is an important step when making a unique box especially for a certain shape and size of the cake.
Cut and Fold the Cardboard
After having your measurements on the cardboard, now you have to cut and fold your cardboard into the right size that will make your cake container.
Score the Cardboard: Search carefully using the back of the craft knife, or scissors and run along the line where you want the folds. Scoring in fact aids to produce neat and equal folds that are desirable in finishing processes.
Cut Out the Box Shape: Very neat scissors, cut out all the areas that have been marked. Make sure to be accurate; this will mean that each side of the box has to be properly fitted.
Fold Along the Scored Lines: If you have written on one side of the paper, you should fold where the pencil lines are to create the box’s sides. Ensure each fold is clean and form nice sharp creases.
It is when you complete these steps that you are going to have a good basic structure which can be an appropriate custom pastry box or cake container.
Add a Window for an Elegant Touch
Having an opening, either in the form of a transparent glass lets the consumer look at the exquisite design of the cake. Here’s how you can add one to your cakebox:
- Measure and Cut a Window Opening: Decide in front which you want the window if they do not fit the box and in most cases they will be found at the top or front of the box. Sketch a square or a rectangle in the materials you are going to use and proceed to gently outlining and cutting into the material.
- Attach Transparent Film: Take a transparent film, cut it in a size larger than the opening that was made earlier. Start by applying some glue or tape inside this bar to make it as secure as possible across the window.
This addition is good for use on bakery boxes and also guarantees that the cake is well covered while at the same time the cake is being displayed. Besides, it gives a polished finish which, when used, can give any plain bake box a store bought look.
Secure the Box Together
After positioning your cuts and folds, it is easy to then join the various edges and attach the base of the box.
- Glue or Tape the Edges: Also, use glue or tape, covering each side and merging them tightly to each other. If it was glued, then keep each section in position until the glue forms a good bond.
- Reinforce if Needed: If you’re dealing with big or massive cakes more so if the cake is heavy then use additional tape or glue and reinforce the edges of the box.
Taping or using strings to fasten the box correctly allows the box not to topple over as it carries your delicious cake.
Add Finishing Touches
You do not want to spoil the aesthetics of your cake packaging by having bad custom cake boxes! For that reason, it makes them appear unique and professional as some other finishing touches are added onto them. Here are some ideas:
Personalized Stickers: Include stickers with backgrounds that have your brand logo or your brand name to help increase the visibility of brands.
Ribbons and Bows: If you wish for the appearance of the gift to be professional, then tie an attractive ribbon around the box.
Printed Labels: When making boxes for specific events such as birthdays or weddings, print messages on the labels.
Create Different Sizes and Styles
As every baker knows, not all cakes are the same, so one has many boxes to choose from in case. Here’s how you can make different types of cake containers:
- Square Boxes for Cakes: Perfect for traditional shaped squares or some kinds of rectangular cakes. It’s simple; you only need to scale everything in proportion to the cake size.
- Tall Boxes: Any time you decorate multi-layer cakes, design folding boxes that have more height and side supports to hold the layers.
- Pastry Boxes: Reduce length measurements for single serving of pastry, cupcakes, or muffin so as to make a small box.
Having choice size/shape options allows more versatility for the type of baked products, tall layered cakes or individual pastry boxes to list but a few.
Disposable cake boxes to help the environment.
If you want to make environmentally friendly choices, you can create eco-friendly cake boxes using recyclable materials:
Choose Recycled Cardboard: Choose the cardboard which is recycled or biodegradable.
Avoid Excess Plastic: Choose paper instead of plastic film as the material of the windows to prevent garbage.
Minimalist Designs: It is best to stick to the minimalist styles where we use as little material as possible.
Having an attractive and environmentally friendly cake packaging ensures that enthusiastic customers for your bake box are contributed to.
Visit Make Your Box Extra Sturdy for Shipping
Whenever your cakes require transportation, you require developing a securely built box to offer your cakes the very best security from movement and damage. Here’s how:
Use Thick Cardboard: It is cheap and functional for use in making the shipping boxes to be more resistant to the handling test.
Add Padding Inside: Pack a cushion at the very bottom of the box it can be bubble wrap or any piece of fabric that is soft.
Secure with Extra Tape: Hey – no plate used for this cake! Reinforce all edges with tape if the box is large or if the cake is really heavy.
It is a cake box that guarantees that the cake does not lose its form and is well packed before shipping the order or for any other kind of distant delivery.
Troubleshooting Tips for Common Issues
Here are some common problems you might encounter when making cake boxes and how to solve them:
Box Too Small: If it feels confined, right, the next time you adjust your dimensions, may as well include an extra inch. Instead, it is possible to use this box for a more modest dessert.
Loose Lid: Deal with the edges by taping this part or adding a small tab which will lock the lid into position.
Unstable Base: If you are after a dense and wet cake, use two pieces of cardboard for the base.
Adapting it slightly depending on situations gives you the best chances for getting perfect cake containers each time.
Want to Encourage Customers To Buy More Cakes? Try Decorating Specialty Cake Boxes for Each Event
Cake carriers are another exciting and convenient way of giving a view of the creativity used in baking your cakes and also a way of keeping the cakes intact from the time you bake and pack them until the time they are eaten. From square boxes for cakes to pastry boxes, at swift print pack we have cake boxes and cake packaging. Regardless if you are just a home baker or you have a boutique bake shop, these boxes give a beautiful package to your cakes making them ready for any occasion.
